Types of Cut Crease Looks
How do you like your cut crease look? Natural or dramatic? Neutral or colorful? Sharp or soft?
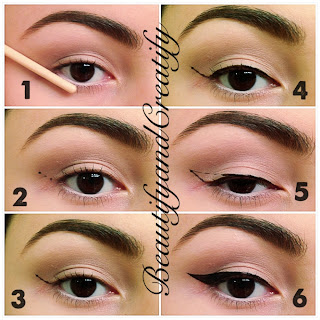
The goal of this look is to define the crease softly (mainly using eyeshadows and pencil brushes) with slight transition to the lid color. As you can see in the following shot of this look, you can't really tell the exact border between the crease and lid color, yet it's obvious that crease is defined more vividly. This is my go to look, when it comes to cut crease looks, and it's just perfect for my hooded lids. Well, actually all cut crease looks are perfect for hooded lids or monolids, which opens up the eyes and "fakes" the lid space.
Today I want to share with you different types of cut crease looks to help you determine your favorite style. Let's get it started!
- I want to start off with my personal favorite: Neutral and Soft cut crease look:
- Next in line is: Neutral and Sharp Cut crease look. I decided to include this as well, since I have a short video tutorial on how to create it, which you can watch here.
In this particular look I used eyeliner to initially "cut" the crease and then blended it out with shadows, which resulted on more defined border between the crease and lid color. Also, as oppose to the first look, in this look winged liner touches the crease line, which is also another variation of the cut crease. If you compare the two, you can see how separate liner and crease line as in the first look, make the eyes elongated.
- The next type of cut crease is in the Sharp and Dramatic range. In this particular look you can see the distinct border between the crease and the eye lid. To create this type of cut crease, you need to outline crease line with dark color, then blend it towards the brow. Afterwards, you'll need to clean out any color smudge from the lid, to make sure the border is sharp and apply lid color strictly below the crease line.
- Another version of Sharp and Dramatic, with the liner and crease line connected version.
As I said before, leaving a gap between crease line and eyeliner may elongate the eye shape, but you can achieve the same result with connecting the lines as well. All you need to do is connect the liner and crease line on the outer part of the eye, slightly shifted from the actual end of the crease. Hope this photo demonstrates the point better:
- However if your point is to make the eyes appear rounder, then round cut crease is the look you are looking for. In this type of cut crease all you have to do is connect crease line with the lash line by drawing semi-circle shape on the outer corner of the eyes. This way you can achieve rounder and wider looking eyes.
- When we say cut crease, we immediately assume bold line that defines crease, making it deeper look deeper. However, you can achieve cut crease without lining the actual crease line, and only applying eyeshadow on the lid by strictly keeping it under the crease. Well, theoretically it could be the same thing, but it's just different way to create it. This particular look was inspired by Lady Gaga.
- In the editorial world, there is also the idea of Negative Space Cut crease look, which also might be referred as Double Cut crease look. It actually requires "cutting" the crease line itself both from above and below. Hope that makes sense. Here is how it looks.
Oh my God, I just realized I've done a tutorial for this Double Cut crease look, which has become very trendy lately, almost three years ago, naming it "inverse cut crease look". You can read that blog post right here.
- Last, but not least, if you are feeling lazy, just draw a crease line and it will work. Just kidding. This is another version (mostly editorial again) of the cut crease look. You can make it more subtle by creating it like the one in this tutorial right here.
Well, I hope you guys enjoyed looking through compilation of my cut crease types. Let me know what you think about this post and don't forget to check out my recent Youtube video. Also, connect with me on other platforms, let's be friends. I'll see you next time. Until then, Stay Blessed. xoxo


Comments
Post a Comment